Monday, October 31, 2011

Trick or Treat


This is a Halloween scenario for Song of Blades and Heroes. On their way back from the Halloween festivities, four villagers stray from the road and find themselves near a stretch of woods that is said to be inhabited by evil spirits. Bolstered by the beverages they had at the festival, they decide to take a shortcut through the forest instead of a long walk back to the road and around it. Besides, just as there are legends about evil spirits, there are also stories about treasure long lost in there...

The villagers
The player's warband are three villagers (Q4+ C2) and one village leader (Q3+ C2, Leader.)
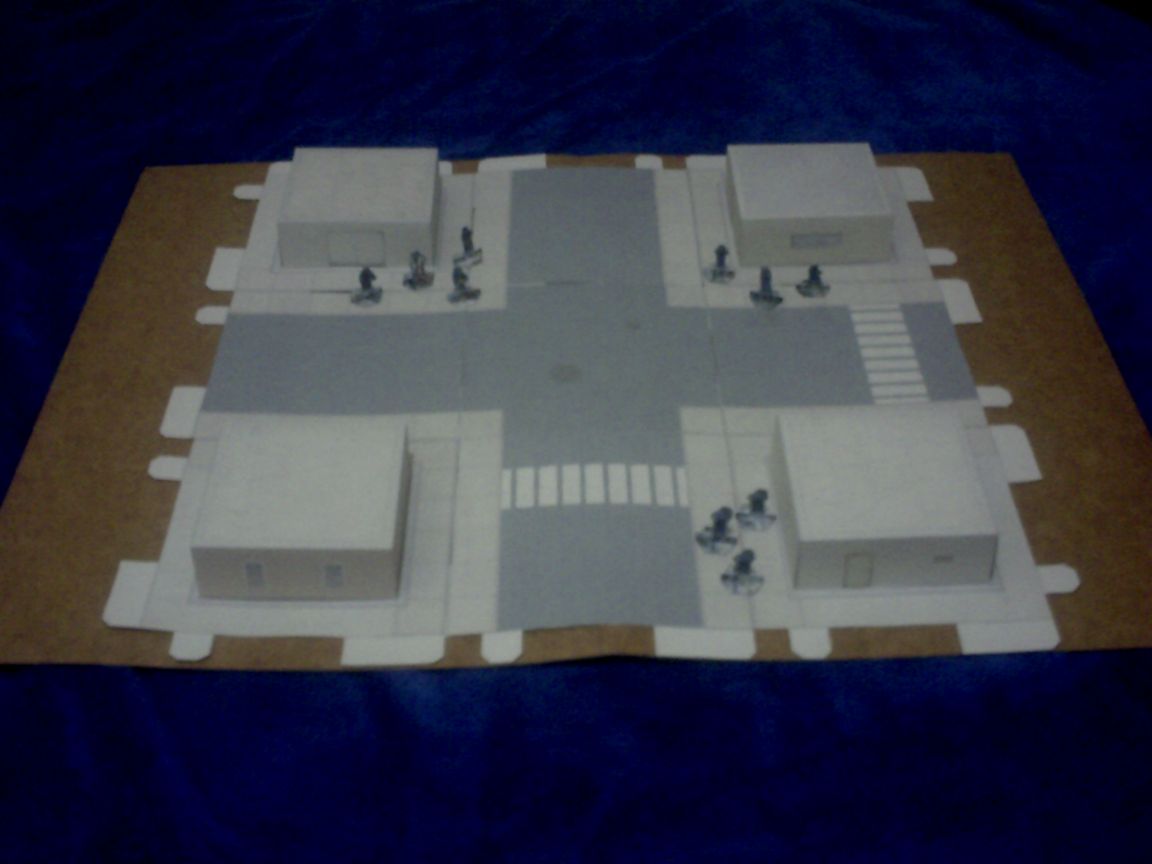

The map
I set up a 2'x2' board to play with 15mm miniatures. A green patch roughly 1/3 of the width of the board is placed in the center, creating the woods (I added some bits to make the wooded area more irregular.) The villagers are placed in contact with one of the board edges without forest terrain. Place three markers of possible treasures in the forest, evenly spread along the middle of the board.


Objectives
The player may end the game as soon as one character reaches the opposing board edge. However, only the characters who are in contact or who have already left through that edge will count as survivors. Optionally, you may attempt to find the treasure. The player gains one victory point for each survivor and one for each piece of treasure.

Evil lurks in the forest
On the turnover after the first villager reaches the border of the forest, you must add three "evil lurking" markers on the board. Roll one die for each marker and place them in the middle of the corresponding numbered section, as shown in the diagram to the right.

"Evil lurking" markers activate as Q4+ characters. They will always roll a single die for activation and they only make Medium moves. If any villager used more than one action to move on the previous turn, they will move towards him (running makes noise.) Otherwise, assign numbers 1-4 to the board edges and roll a die to determine direction of movement. The markers will not leave the forest (re-roll if you get a 5-6 or an impossible direction.)

When any villager gets within 1 Medium of an "evil lurking" marker, roll one die to determine what it is. 1-2 = nothing, you must be hearing things. 3 = skeletons, 4 = wolves, 5 = ogre, 6 = vampire. Write down the number rolled. If you roll the same number again on another marker, re-roll. Once the result is determined, remove the marker and place the monsters where it was. If it was the end of the turn, the monsters may act right away. Otherwise, if the marker was resolved due to having moved towards the player, the newly placed monsters will only activate on the next turn.

The stats for the monsters are: Skeletons: two skeletons, one armed with a rusty sword and another with a short bow (Q4+ C2, Q4+ C1 Shooter: medium.) Wolves: two hungry wolves (Q4+ C2 Forester.) Ogre: one marauding ogre (Q4+ C4 Big, Long move, Slow.) Vampire: a powerful vampire (Q3+ C3 Magic-User, Terror.)


Activate the monsters in order of best to worst quality and from closest to farthest from villagers. All will roll two dice for activation except for the last, which will roll three dice. If there are still remaining markers, activate them before the monsters.

Skeletons will attack the closest villagers (the archer will prefer keeping its distance.) The wolves will gang up on the nearest villager. The ogre will attack the closest target (including monsters) except for the vampire. The vampire will target the nearest villager and will always try to transfix first. Monsters will only switch targets if their current target is killed or if they get attacked by someone else. Oh, and monsters will not check for morale.

Treasure
To look for treasure, a villager must be in base contact with the treasure marker. One action must be used to search and then another one to pick up the treasure. Once the treasure is retrieved, remove the treasure marker from the board. Make a note about which villager is carrying treasure and how many (each villager can carry up to two treasures) because if they die, the treasure is lost. Note that to score victory points for the treasure, it must be with a survivor.

Other notes
Before the "evil lurking" markers are put on the map the player will be moving just the villagers. However, it's still important to take note of when a turnover happens (by failure or by moving all figures) to be able to determine if anyone ran on the previous turn. Remember that the forest reduces movement for all figures except the wolves...

Battle Report
Starting from the board edge, I slowly advance towards the forest, then move one of my characters to touch the forest edge. I then roll 5, 6, 6 for the markers, meaning evil is lurking nearby. Even worse, one of the markers is within range of my leader. I roll for it getting a 3: skeletons.


On the monsters' turn, I move the markers and then activate the skeleton archer with two successes. It moves towards the forest edge and shoots the leader, killing him! This leads to cascading morale failures, so that only one villager remains on the board. On the next activation, the villager gets three successes and runs away from danger, trying to cross the woods as fast as possible. This, of course, attracts the markers. One of the markers reaches Medium range and is resolved into the wolves (however they will only move on the next turn of the monsters.) One of the skeletons triggers a turnover.


I roll two successes for the villager, reaching the other edge of the forest. On the monsters' turn, the last marker moves closer and resolves into the Ogre. One wolf activates with one success and reaches the villager. The other one rolls a turnover.


The villager gets two successes and uses them to disengage from the wolf. On the monsters' turn, the wolf reaches the villager again and the Ogre rolls a turnover. After a series of turnovers rolled by the villager and the wolf, the villager manages to knock the wolf down (on an attack by the wolf.) The ogre activates, attacking and killing the other wolf. The villager then rolls a single success, moving close to the board edge.


The knocked down wolf recovers but doesn't have another action to chase the villager. The ogre and skeletons move towards him but are still far away. On the next round, the villager activates with two successes, more than enough to leave the board and end the game with the closest possible victory for the scenario. Whew!

Conclusion
After a terrible start, I got some lucky rolls, and got one survivor who'll have plenty of stories to tell on his village...

This scenario might need some tweaks for better balance. Two things I'd try, in this order, are: change the movement of the "evil lurking" markers from Medium to Short and change the skeleton archer into another skeleton warrior. Another idea is to upgrade the village leader from C2 to C3.

Saturday, October 29, 2011

Gangers just wanna have fun

For my second shot at 5150: New Beginnings I created a ganger star and hired a bunch of other gangers as his crew. Meet Fingers, Chrome, Bigmouth, Vicky, Viper, and Thunder. For his voluntary encounter, Fingers interviewed with an entertainer, Nova Corp (a mega corporation) and the Gaea Prime government. Not only he failed at all three but the mega corp and the government won't ever even interview him. Ouch...


So, without an employer and with five gangers itching for action, Fingers decided to raid a building that is used by the Skulz gang. The place is located in the Lower Income neighborhood of the city and they will raid it in the evening. The objective is to hurt as many gangers as possible and to steal any stims found in the building (roll of a 6 when entering a building section, requires a character to search instead of taking active fire, cannot be done while involved in a firefight or melee.) Using the Raid encounter from the book as a reference, I rolled for seven basic gangers with one standing guard outside of the building and the other six organized into two PEFs (possible enemy forces) inside the building.


Friday, October 28, 2011

Grey City Building Templates

After a recent comment I realized that I never posted the templates for the buildings of the Grey City campaign. Here they are, in PNG format, which should be easy to modify by coloring, adding textures etc. All of these should be printable in either A4 or Letter format sheets of paper. There's a total of six templates.

The first three buildings take a single printed sheet each. By modding the storefronts (and the side window in the case of the deli) it's possible to use them as "building blocks" for a larger city.


Sunday, October 23, 2011

My portable kit for New Beginnings

Here are some pictures of my kit to play encounters in 5150: New Beginnings. The generic building map has already appeared on my last battle report; the other pieces were created today. Everything is at 50% scale so 1" squares are actually 1/2" on my boards. The small size would be bad for multiple players but it is great for solo play (for reference, I placed a 15cm ruler on the board.)
Inspired by some pictures from the game book, I created flat markers for buildings and parks using Shuffler. The car flats come from the Paper Dead (Set 1) from Daring Entertainment. For the figures, after trying several different styles (simple "inverted T", trigonal, "inverted T" with black borders and cut out contour) I decided to use standard A frames. This isn't the best-looking style for paper miniatures but they are stable, extremely easy to build, give some sense of volume and they are easy to read on the table, as the picture is slightly tilted upward -- especially important in my reduced scale setup. This also makes them appear well on photographs. These specific minis are from the cyberpunk sets from Precis Intermedia, printed at 65% scale.
Lastly, here is a picture of the kit ready for storage. I place all the terrain in a folder and all miniatures, building markers and cars in a plastic bag.

Saturday, October 22, 2011

Arriving in New Hope City

I've finally got to a point while reading 5150: New Beginnings that I felt secure to try a first game. Note that this doesn't mean I've thoroughly read and grokked every detail of the game; that will take a while. However, I really wanted to try the character creation, encounter system and other immersion features of the game.

So here's my first crew for New Beginnings. Meet Ken Folstom, a computer tech who decided to start running his own shady operations [Star, Rep: 5. Class: dropout. Motivation: profit. Skills: fit 3, pep 4, sav 5, sci 0. Attributes: steely eyes, dim. Equip: BA machine pistol, armored jacket, CPU (5) with lock-on loop, local com-link, apartment (LL3) with alarm system, old car, 8 items saved]. After generating the Star, it was time to randomly recruit his assistants.

Ken, Orson and Ella

Ken's main associates are Orson, an attorney (rep 3 dropout) and his trophy wife Ella (rep 4 dropout), a married couple of thrill seekers. He has also recruited the help of a car mechanic and overall "fixer" of stuff, May (rep 4 LWC) and Rally, a bounty hunter dangerously close to the limits imposed by the law (rep 3 LWC).

With crew ready, it was time to look for a job. A smuggler named Karl wants someone to break into a police depot in the space port district (law level 2) and grab some goods that were recently aprehended. Obviously the best time for this action is late at night. Karl says that the depot is not heavily guarded as confiscated weapons and drugs are not stored there (he's interested in some expensive medical supplies). A dangerous job, but it should give Ken some fame and money.

Sunday, October 16, 2011

It Is Warm Work

I hadn't paid much attention to naval miniature games so far, being mostly interested in ground-based skirmish games (whether fantasy or sci-fi.) This changed after a friend of mine commented about a soon-to-be-released fantasy naval wargame by a well-known law firm that also makes miniature games on the side. This made me want to find alternatives to that game that I could suggest to him.

So after looking for reviews on the internet, I found this interesting post about the game called "It Is Warm Work" which seemed to be newbie-friendly enough. I got it in PDF form and started reading. Since the rules are only a dozen pages long, I was quickly done and eager for a playtest. This led to the problem that I don't have any miniature "age of sail" ships (or any ships, for that matter.) The author of "It Is Warm Work" states that different miniature scales can be used but suggests 1:2400 ships placed in 1"x2" bases. Since I couldn't find any ship counters on a quick search on the internet, I made my own. You can click on the image to the right to get them at 300dpi, printable in A4 or Letter sheets. In my case, I printed them on a sheet of 120gsm paper and glued it to heavy cardstock.

After printing these and the playing aids and status markers that come with the book, I was ready for my first "naval action." It must be noted that I have pretty much no knowledge of sailing, naval miniature games or the history of the age of fighting sail. Therefore, I had to look up sailing terms such as "in irons," as well as learn more about fire ships (I never imagined that there were ships purpose-built to be set in flames as a tactic,) the line of battle, ships-of-the-line, prize crews among others. That is the downside of a slimmed down rule book -- it will inevitably rely on more prior knowledge from the reader. Anyway, good old Wikipedia was more than enough to give me pointers on the subjects.

Instead of trying to build a complete scenario I just placed a line of four class-B 74-gun ships on one side (thus dubbed "team A") against three class-A 74-gun ships on the other (which will be "team B",) with the wind initally favoring the side with less ships. My first playtest was a delightful session where I learned that maneuvering sailing ships is not like moving infantry or vehicles... after putting team A's first ship in irons and nearly dismantling team B's line, all in the first turn, I decided to start over.
The second time around, I managed to make more sensible actions. In the first exchange of fire between the ships, team B caused severe damage to team A's first ship, almost destroying it (note: in this picture I moved the wind arrow to maneuver the ships. In the future I might simply pick one of the board edges as the direction of the wind as suggested in the book.)
A couple of turns later, most ships had taken at least some damage, but team A was in worse condition, with one ship nearly destroyed and another one impaired.
Eventually the first ship from team A struck her colors and since two other ships were crippled, I decided it was a victory for team B, through a combination of sturdier ships and some luck in the attack rolls. The entire battle with seven turns lasted about 50 minutes, part of that due to my constant checking of the book as I learned the rules. Bookkeeping was minimal, with a one-line damage track per ship. Playing with ship counters was surprisingly satisfying as I could stack the status markers on top of them.

Conclusion
This little experiment raised my interest in naval miniature games. I guess I must thank my friend for unknowingly leading me to a great set of rules and making me find a new type of game that I enjoy. "It Is Warm Work" is designed for large fleet battles and seems to do its job very well. I'm curious now about other rules sets for only a handful of ships, that might add detail that would be unwieldly in this scale.

Incidentally, all the simulation aspects that get into naval miniature gaming -- especially the maneuvering of the ships -- made me think that this (or maybe spaceship miniature games) might be the answer to another question that has been pestering me: how can I have miniature games that do not revolve around combat? I'll try to write a fictional scenario for It Is Warm Work involving some sort of rescue, drifting ships and a coming storm...

Saturday, October 15, 2011

Modular 15mm terrain - take two

So in preparation to run some 5150: New Beginnings I have gone back to creating some modular urban 15mm terrain. Each tile is 6"x6", allowing a variety of streets and blocks configurations. The buildings fold flat. The files may be obtained on this thread of the Cardboard Warriors forum. Here are some pictures of the results, printed in economy mode on gray paper.


A closer look on one of the buildings. While the streets and sidewalks look good enough in economy mode, I might end up printing the buildings again in normal setting. On the other hand, this "washed out" look makes the minis stand out.

Here's a shot with a few miniatures (from Precis Intermedia) printed in reduced scale to be used as 15mm. The tiles are connected to each other through a simple system of tabs. The buildings are slotted into the tiles so that they don't move around too.

And another shot to show a bunch of minis on the board, to get a better sense of scale. For a proper game, I think I still have to print some more tiles, to get a 2'x2' area at least. For learning the rules, this will certainly do.
The tiles are a little annoying to put together but the tabs solve the problem of having them easily moving around while playing. An alternative would be to glue each tile to a piece of thick cardboard or foamcore but then another method of slotting the buildings into the tiles would be needed.

Saturday, October 8, 2011

Creating a bad neighborhood on the cheap

After Slorm's comment about the paper buildings on my previous post, I thought it might be useful to someone in need of some urban terrain done quickly and quite cheaply. It might be useful as an activity for kids, too.

Everything starts with a template. The idea is to build a box with five sides. You want to have some tabs on the open side to help keeping the building walls straight -- especially if you're using common scratch paper like me. The template is simple enough to draw by hand with ruler and squares but if you want to make several buildings, it may be worth to print the template (I have a couple at the end of this post.)

In my case what I do is to print just the outlines in "fast economy" mode and draw the details. Alternatives include drawing some basic outlines like doors and windows on the template before printing, maybe even some rough coloring (be sure to use some "economy" mode or you'll miss the point of keeping these cheap) or printing in colored paper.

Friday, October 7, 2011

Modern Havok

While I waited for 5150: New Beginnings (which is now printed and bound and I just need some time to read,) I started looking for other Two Hour Wargames (THW) products. The pulp-era games are interesting but I still have to prepare a minimum set of minis and terrain for that period before I decide to get those rules. So I found Modern Havok, a rules set written by Ed Teixeira for Rebel Minis.

Modern Havok is quite similar to Chain Reaction 3.0 but with differences (some of them subtle) that make the game simpler and possibly faster and more lethal. For instance, Stars aren't so tough and there aren't as many states a figure may be in (like Hunker Down etc.) Melee combat is also different, and most of the time faster.

For me, the three scenarios at the end of the book (Liquor Store Holdup, Man Hunt and Raid) make it worth. Lots of good ideas, like the Draw Down system for resolving an armed "face off" between opposing groups, reaction to police arrest attempts and a way to simulate a larger battlefield in a 3'x3' table.

I ran a quick test scenario with these rules. It was also a chance to try some hand-draw buildings I've been fiddling with (in preparation for some improved versions.)

In this scenario, I controlled a group of four gang members: a rep 5 star with a BA pistol, two rep 4 thugs with shotguns hidden in their trenchcoats and one rep 3 guy with a machete and pistol. They were looking for some members of a rival gang in a run down area of the city. There were some civilian groups scattered about and I placed three markers that might be the location of the rival gang. I also established that if I rolled a sum of 10+ on the activation rolls, an ambush would occur with 1-3 enemies appearing from each end of the "street."
I used the marker movement system from the Raid scenario to move the gang markers. If a marker came into sight I would roll a die to check if it was a group of civilians (1-3) or the rival gang (4-6) consisting of 2-6 members. Upon finding the gang, the other unresolved markers would be removed.

During the game, the rightmost marker (on the above picture) turned into a group of three rep 4 gangers. The leader was armed with a semi-automatic rifle and the two others carried pistols. I used the Draw Down mechanic (from the Liquor Store Holdup scenario) to have both groups see each other and react drawing their guns. The enemy gang fired first but missed. The two thugs with shotguns on my group ducked back behind the two-story building and my star stunned the enemy leader. Using the "flock of seagulls" mechanic, one of the civilian groups retired from the table while the other two ducked back behind buildings.

On the following turn, my group advanced and the enemy didn't roll well on their In Sight reaction to my thugs leaving the cover of the building. This allowed them to fire again, taking all three enemies out of the fight. The civilians remained ducked back as the firefight continued and my gang members, having dealt with their target, ran away before other threats would arrive.

Sunday, October 2, 2011

Exterminator Jack

Here's the model I created for the Papercut Awards 2011. Since the contest is over, I thought I'd post the model here. It's a 28mm scale 2.5D multi-part model that I named "Exterminator Jack." Equally fit for a zombie apocalypse or post-holocaust sci-fi setting, with his plasma thrower. Some textures were obtained from cgtextures.com and the figure was drawn in good ol' Gimp.

Here is the printable sheet in 300dpi. The red lines indicate places that should be scored and folded. For a great paper modeling guide, check this link (Dave's Games) at the top of the page.